Any Independence Day tea for us former Colonials has to include something red, white and blue, and for me a simple, somewhat rustic version of a berry tartlet does the trick.

My version is based on a couple of different recipes. The filling is really very easy – based on “Fresh strawberry pie bites” from Sarah over at Sugar Apron. Though instead of just strawberries, I’ve mixed it up and added blueberries and cherries as well.
I also tried two kinds of crust – wasn’t sure if I’d like a cookie kind of crust or a pie crust better with this particular filling, so made the cookie one from scratch, and went “semi-homemade” with the other, using a pre-made frozen pie crust brand in our local stores that I wanted to try anyway.
The cookie crust is taken directly from Sally’s Fresh fruit tart recipe at Sally’s Baking Addiction (who, I might add, has great step-by-step photos of making the crust. I’m afraid I threw mine together rather haphazardly this time, so didn’t get photos of each step – even though it is straightforward to make!).

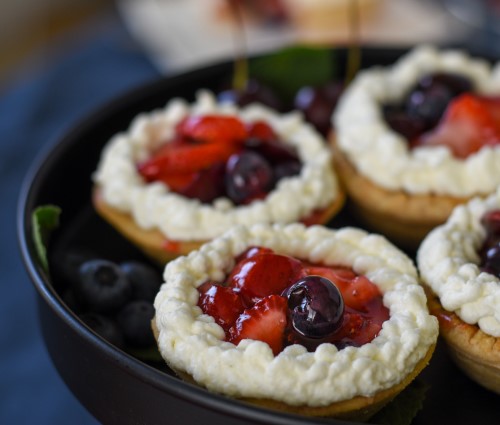
I personally think a little extra glaze dripping down the crust only makes them look more appetizing!
As to which crust I preferred with the filling, because the fruit plus the fruit glaze isn’t overly sweet, I actually prefer the cookie crust over a traditional pie crust in this combination. But then, on the sweet-to-salty spectrum, I definitely favor the sweeter side!
Add a lightly sweetened whipped cream to finish it off and it makes for a very appropriate dessert in keeping with the US Fourth of July theme!


I used small egg tart molds for my tartlets, and just used a pastry cutter that was slightly larger than the diameter of the molds to cut them out and press them into the molds.
These crusts are completely baked before filling them with the fruit mixture and whipped cream, so don’t forget to chill them thoroughly before baking and use something like ceramic pie weights or dried beans or rice to help retain the mold shape while it bakes.
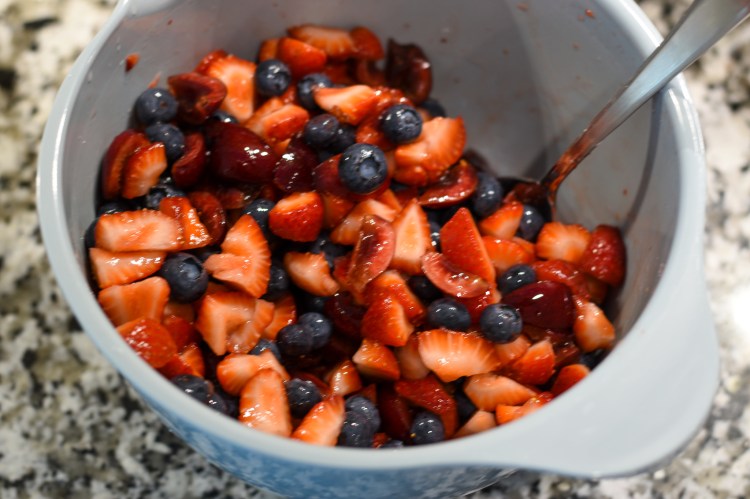
I just cut up into small, not necessarily even pieces, leaving the blueberries whole
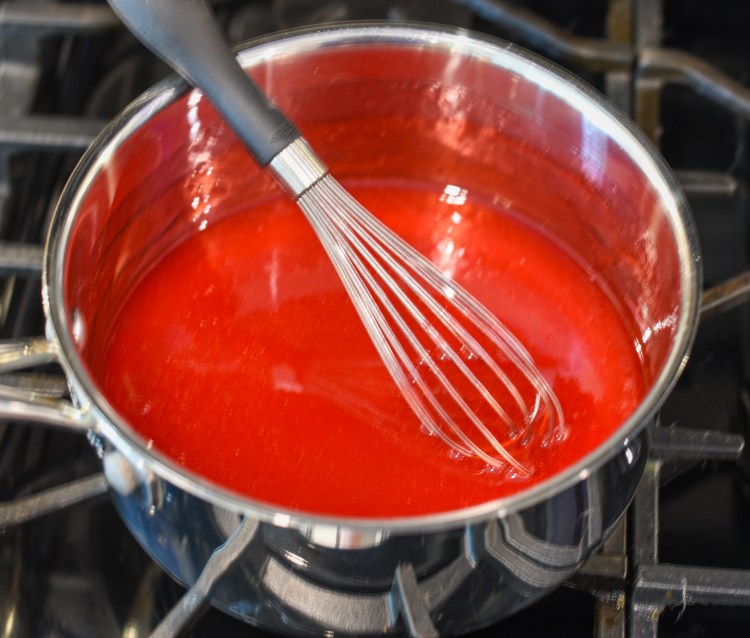
The strawberry glaze comes together quickly on the stovetop with a little whisking

I mixed in some of the glaze into the fruit, as well as drizzled some over the top at the end to have fully glazed fruit
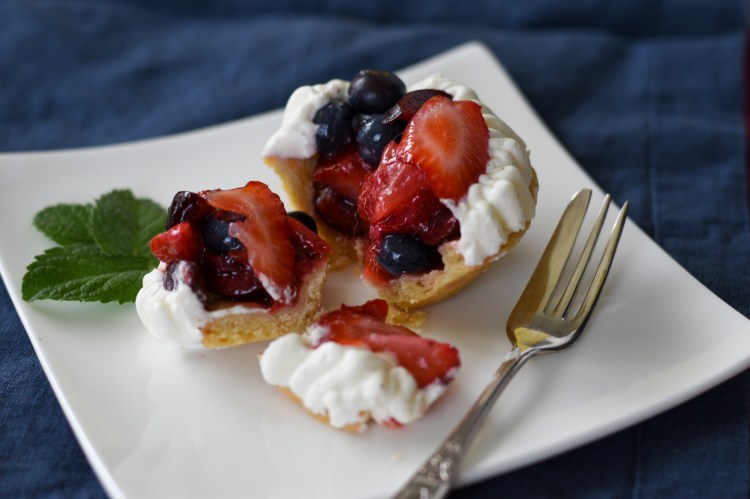
I also try to arrange so there’s at least one of every fruit showing on the top
As to the whipped cream topping, I piped some on with a big round tip, as well as an elongated tip that makes kind of a ribbony shape when you go back and forth with it (how’s that for technical decorator terms?!). Clearly, piping is a skill I have yet to master, hence I think of these as “rustic”!
At the end of the day, it’s somewhat about look but a LOT about taste, right? So I wouldn’t fret too much about how the whipped topping is piped or spread!


Berry Cherry Tartlets
Ingredients
-
For the pastry:
- 2 Tbsp. cold heavy whipping cream
- 1 large egg
- 1/2 tsp vanilla extract
- 1 and 1/3 cups all-purpose flour
- 1/2 cup. powdered sugar
- 1/4 tsp. salt
- 1/2 cup unsalted butter, cold and cubed
- Cooking spray for the molds
Directions
Whisk the heavy cream, egg, and vanilla together in a small bowl and set aside.You can work the crust together with a pastry cutter or food processor – first whisk the flour, powdered sugar and salt together. Add the cubed butter and cut or process it in until the entire mixture resembles pea-sized crumbs.
Pour the heavy cream mixture on top and stir or process to combine and form into a thick disk. Feel free to use your hands to get it all combined.
Wrap your disk in plastic wrap and refrigerate for 1 hour or up to 2 days ahead of time. When you’re ready to use the dough, remove it from the fridge and roll it out. (If you’re returning to the dough the next day, let it return to closer to room temperature so it’s easier to roll out; you’ll be chilling it again before it gets baked).
If making smaller tartlets, cut out circles slightly larger than the circumference of the tart tins and fill the tart forms which have been prepared with cooking spray.
Preheat the oven to 400 degrees Fahrenheit. Refrigerate (or better yet, freeze) the tarts while the oven is preheating, and once the oven is preheated, line the tarts with foil or parchment and fill with pie weights to pre-bake the crusts (also known as blind baking).
Bake at 400 for 10 minutes, then reduce the oven to 350 degrees Fahrenheit, remove the foil or parchment and weights, and finish baking, another 5-10 minutes more (longer if frozen), or until lightly golden brown.
Allow to cool completely before filling.
For the filling and glaze:
- 1 cup water
- 1 cup sugar
- 1 3-oz. box of Strawberry Jell-O
- 3 Tbsp. cornstarch
- 4-6 cups of fresh berries – I used about 3 cups strawberries, 1+ cups blueberries and 1+ cups cherries
To prepare the filling, Put the water, sugar and cornstarch into a saucepan on the stove and bring to a boil. Whisk constantly until it becomes thick, or about 3 minutes.
Then whisk in the Jell-O and cook for about a minute longer. Remove from the heat and let cool for about 10-15 minutes.
Prepare the fruit by washing, removing cores and slicing up the strawberries and cherries; you can leave the blueberries whole.
To assemble, mix half of the cooled glaze with the fruit, then spoon the mixture into each of the cooled tart crusts. Drizzle additional glaze into each tartlet as needed to fill and make sure the fruit is glazed.
Refrigerate until set.
For the whipped cream topping:
- 1 pint of heavy whipping cream
- 1 tsp. vanilla extract
- Granulated sugar to taste – I used about 2 Tbsp.
Whip the cold heavy cream with a hand or stand mixer until soft-peak stage. Add the sugar and vanilla, and continue to beat a bit more until stiff enough peaks to pipe.
Pipe as much on top of the tarts as desired!
I think these are best eaten within a couple of days for the freshest fruit and best whipped cream consistency. Hope you enjoy these as much as we did!

Looks delicious!
LikeLiked by 1 person
Thanks so much! 🙂
LikeLike