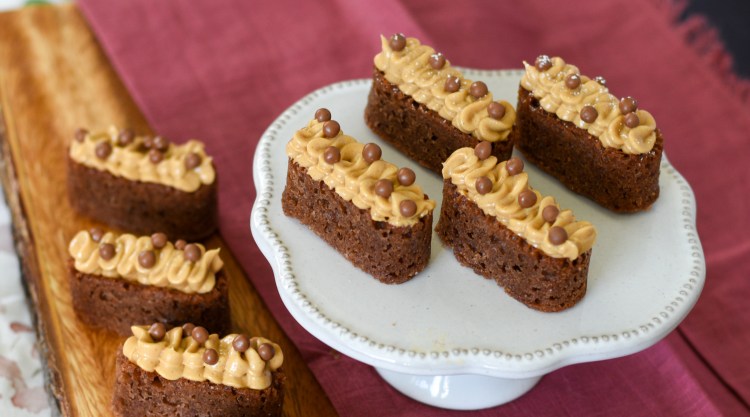
I think I could make these mini cakes every other week – not only were they absolutely delicious, they were actually pretty easy to make, are a great size for an afternoon tea or if you just are looking for a little portion control (I mean, who isn’t?!), and even for an amateur baker like me, I think they turned out looking pretty fancy, as fancy goes!
Oh, and I could see plenty of variations on the theme – different mini mold shapes, change up the cake flavors, frostings, sprinkles or other toppings, maybe add a drizzle, or a little alcohol…I could see serving different versions of this on just about any tea tray.

This started out as another experiment, taking recipes from two favorite bakers and tweaking to fit my vision. Full disclosure, this was the second cake recipe I tried to use with this silicon mold, the first one not exactly getting into the nooks and crannies of the form.
Though this chocolate cake recipe is a fabulous sponge (one of Mary Berry’s, so of course it’s perfect!), I’m just not sure if maybe the texture isn’t quite right for mini silicon molds vs the way it’s usually baked, in the larger circular Victoria sandwich tins. It pretty much filled up the nooks and crannies, but I did have to “nudge” it down a bit with a spoon.
But let’s break it down, so you can see that it’s something us amateurs can handle! Firstly, I started with Mary Berry’s Baking Bible which has her Chocolate Victoria Sandwich recipe. I didn’t change the ingredients, though next time I think I’d try to get just a teensy bit more chocolate flavor in there, like maybe add some dark chocolate in addition to the cocoa called for in the recipe.
I used this Silikomart oblong inset silicon form for very small cakes – the perfect two-bite cake.


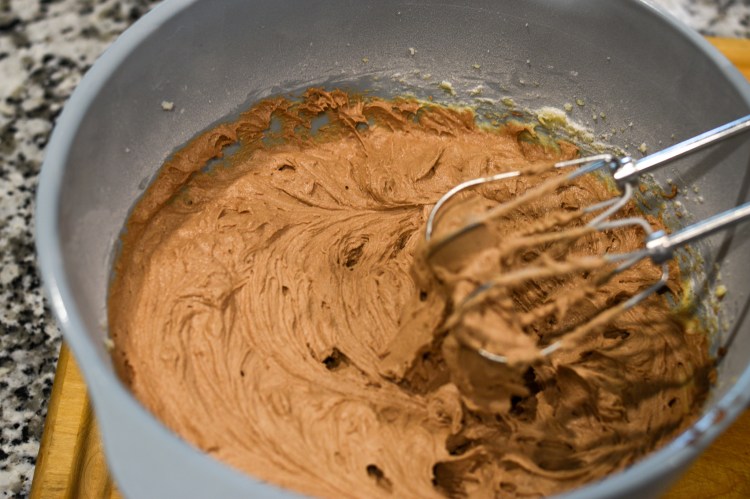
I use the creaming method, starting with creaming the butter and sugar together, then adding the rest of the ingredients and mixing them in as I went.


Here’s where it gets a little time-consuming with mini cakes, filling all the mini molds and waiting for each batch to cool pretty completely before removing them, then filling for the second batch. I was able to fill the 20-piece mold a couple of times, and had a little left over to fill a couple of small pudding-type molds to make a couple of mini-Victoria sandwiches as well.

Don’t forget to spray your mold to make it easier for the cooled cakes to be removed! 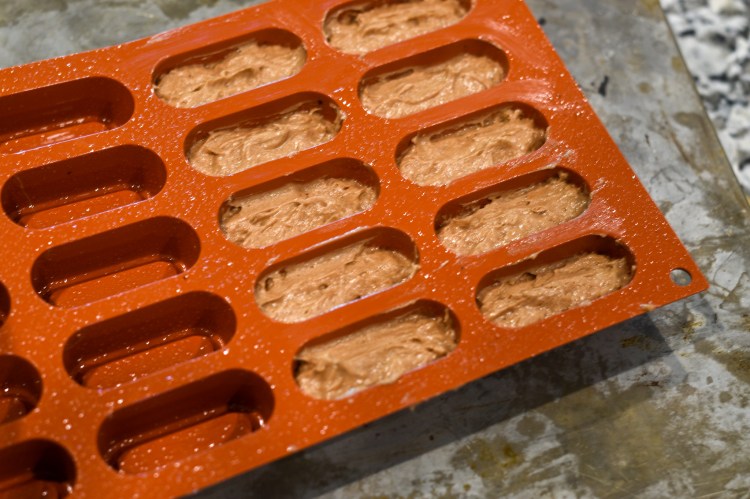
About 1 tablespoon of batter works well (you can always trim off a little excess) 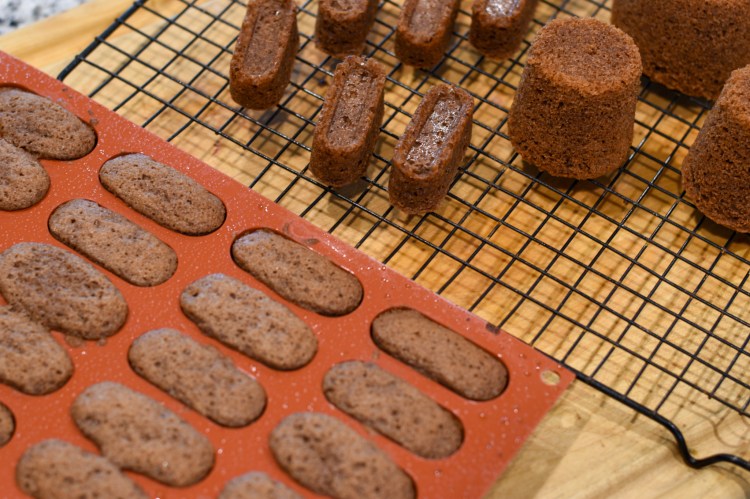
After they’ve come out of the oven. Make sure you wait until they are FULLY COOLED before taking them out of the mold, OR to trim any of the bottoms off to make them even
And voila! They are ready to frost and decorate.
Chocolate Victoria sponge

Ingredients
- 2 Tbsp. cocoa powder
- 3 Tbsp. boiling water
- 8 oz. softened butter
- 8 oz. caster or granulated sugar
- 4 large eggs
- 8 oz. self-rising flour
- 2 tsp. baking powder
- Cookie butter frosting (recipe below)
- Milk chocolate crispearls to garnish
Directions
Preheat the oven to 350 degrees Fahrenheit. To make the mini cakes, spray the silicon mold with cooking spray. (To make a regular size Victoria sandwich, grease two 8-inch sandwich tins, then line the base of each tin with baking parchment.)Blend the cocoa and water in a mixing bowl and leave to cool slightly. Cream together the butter and sugar, beat in the eggs, then beat in the sifted flour and baking powder and the cooled cocoa mixture.
For mini cakes, take about a tablespoon of batter and put in each form in the mold. Nudge it in a bit with a small spoon, and try and smooth out the top of each cake somewhat. Continue until all are filled. Set on a cookie sheet to bake – makes it easier to transfer in and out of the oven.
When baking mini cakes, bake for 15 minutes, then check with a toothpick (may need up to 20 minutes). (If baking in 8-inch sandwich tins, may need to bake up to 25 minutes). Cake should spring back when lightly pressed.
Leave to cool in the silicon mold until cool before attempting to remove them (and cook another batch, assuming you have one mold and are cooking 20 at a time). The more they cool, the easier they’ll come out of the mold. If cooling a full sized sponge in 8-inch tins, let them cool a few minutes, then turn them out, peel off the parchment and finish cooling on a wire rack.
Before you assemble, if you have some uneven cake bottoms, you may want to take a serrated knife and just slice of the extra to make them even. This works just fine as long as the cakes are fully cooled.
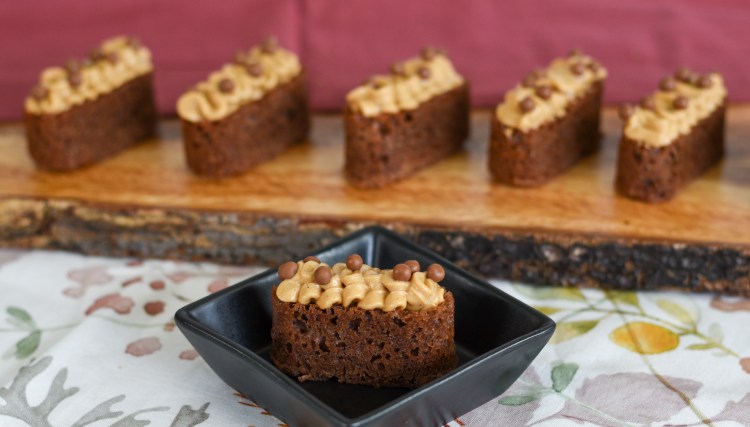
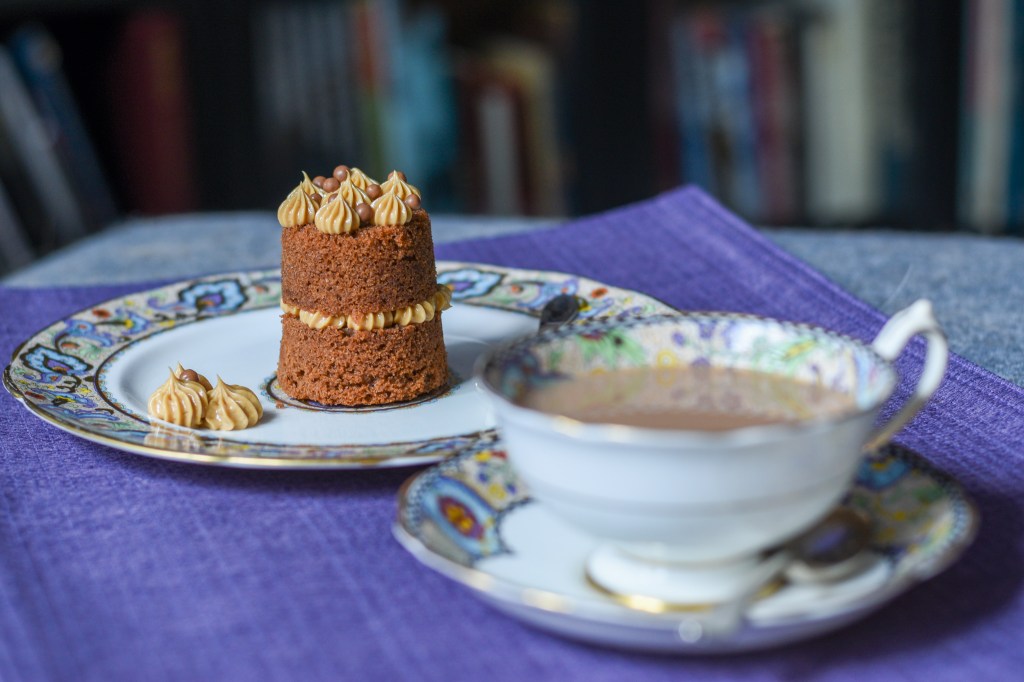
To assemble the mini cakes, frost with the cookie butter frosting, and garnish with chocolate crispearls to finish. (Could be garnished with chopped honey roasted nuts, sprinkles or simply a little sifted powder sugar, as desired).
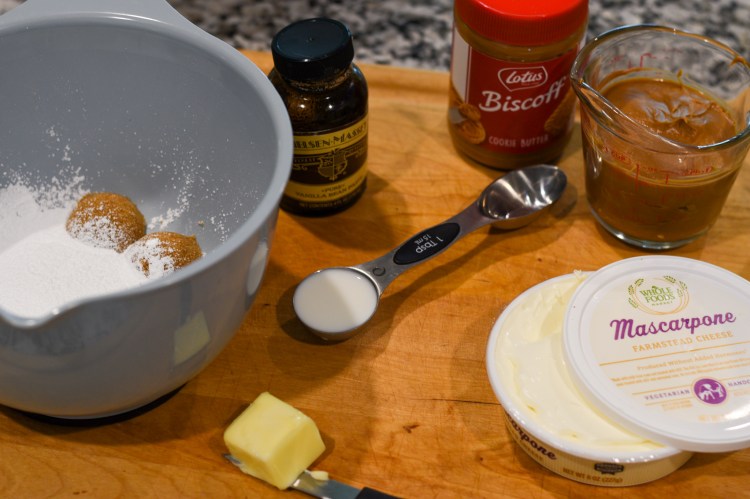
I’d originally contemplated a peanut butter frosting, but when I found a jar of Biscoff cookie butter at my local Cost Plus World Market, that was it. Have always LOVED those Lotus Biscoff cookies; a frosting made with the butter just had to be good!
So my frosting recipe came from the “Chocolate and peanut butter delices” from Will Torrent in his Afternoon tea at home book. Not only did I change out the peanut butter for cookie butter, but I used mascarpone cheese instead of cream cheese.
I love a good cream cheese frosting, but I didn’t want the “tang” from cream cheese in this one, and I gotta say, I may switch to mascarpone all the time – I thought the result was fabulous. Definitely a recipe to hang on to for other creations. I could spread that on toast and make it a regular indulgence if only it were better for me!

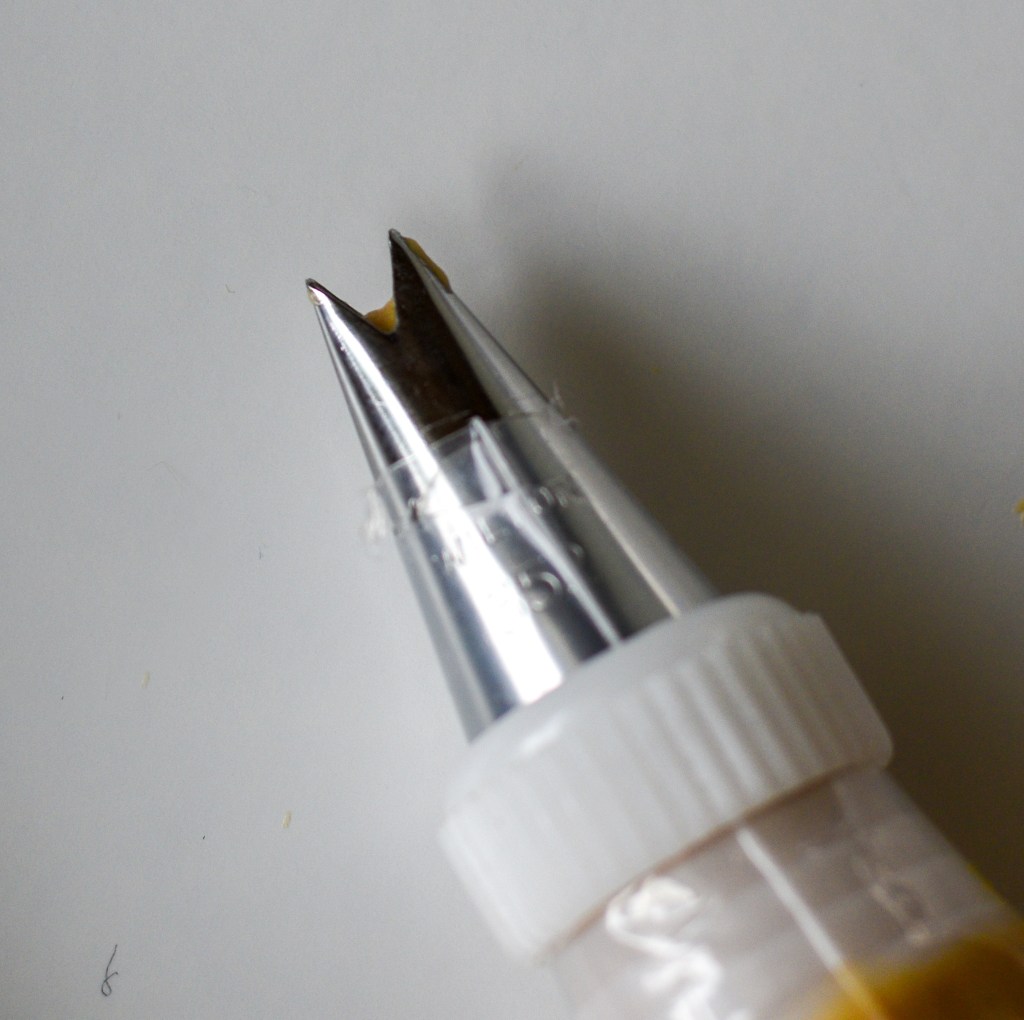
Tried to get a little professional and pipe my frosting on – used the “V” piping tip that makes that ribbon candy look when you look at it from the top. To get the ribbon look, pipe with the tip flat against the top of the cake.

Finally, I topped these with Callebaut milk chocolate crispearls, which add a tiny bit of crunch to the mini cakes, and would make just about anything taste good!
Cookie Butter frosting

Ingredients
- 8 oz. mascarpone cheese (may also use cream cheese)
- 3/4 c. smooth cookie butter (like Biscoff; peanut or nut butter would also work)
- 1 1/2 Tbsp. butter, softened
- 1/3 c. powder sugar
- 2 Tbsp. soft light brown sugar
- 1 tsp. vanilla extract
- 1 Tbsp. whole milk
Directions
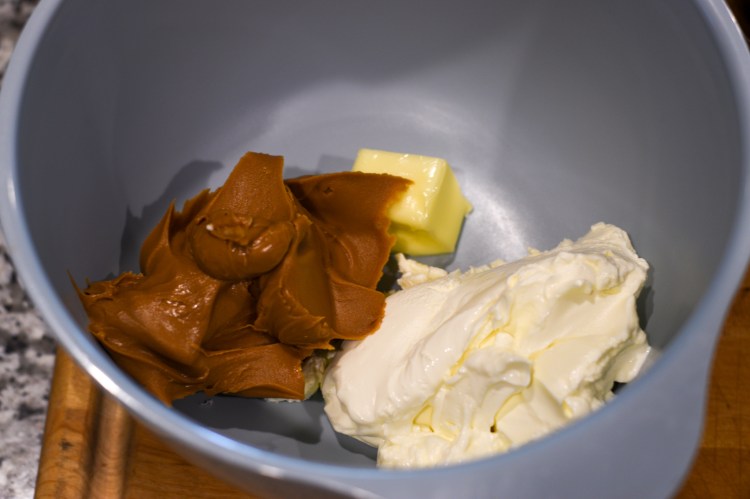
Scoop the mascarpone cheese, cookie butter and butter into a large bowl and beat until smooth.Sift the powder and brown sugars, vanilla extract and milk onto the mixture and beat again until smooth and creamy.
To make the mini cakes, put the frosting into a piping bag and preferred tip. Frost cake as desired.
Serve for your afternoon tea final sweet course with a nice black tea. As a two-bite cake, you should have room for more than one!
For another way to serve them, as I had a bit of batter left over from the mini-oblong shape, I was able to get a couple of small Victoria sandwich sized cakes out as well. I changed up the piping tip for a star one, but it’s the same cake otherwise, just presented a little differently.


Tea in the library, anyone?


Beautiful!
LikeLiked by 1 person
Thank you so much! 🙂
LikeLike
These look delicious and so pretty 🙂
LikeLike
Thank you, Tanvi! That is so kind 🙂
LikeLiked by 1 person
So cute!
LikeLiked by 1 person
Thank you, Dorothy!
LikeLike