I stumbled across this recipe and was intrigued firstly by the name of it – it sounds quite springy, does it not? Though I suppose anything with flowers hints at spring!
I’ve also never done a boiled icing, but how could brown sugar, butter, cream and coconut not be simply amazing on top of cake?
This cake feels a little like comfort food; I’m not sure where it originated, but it’s got a homey simplicity to it that could be something someone’s grandma created by accident and the family loved it so much, it just lived on.

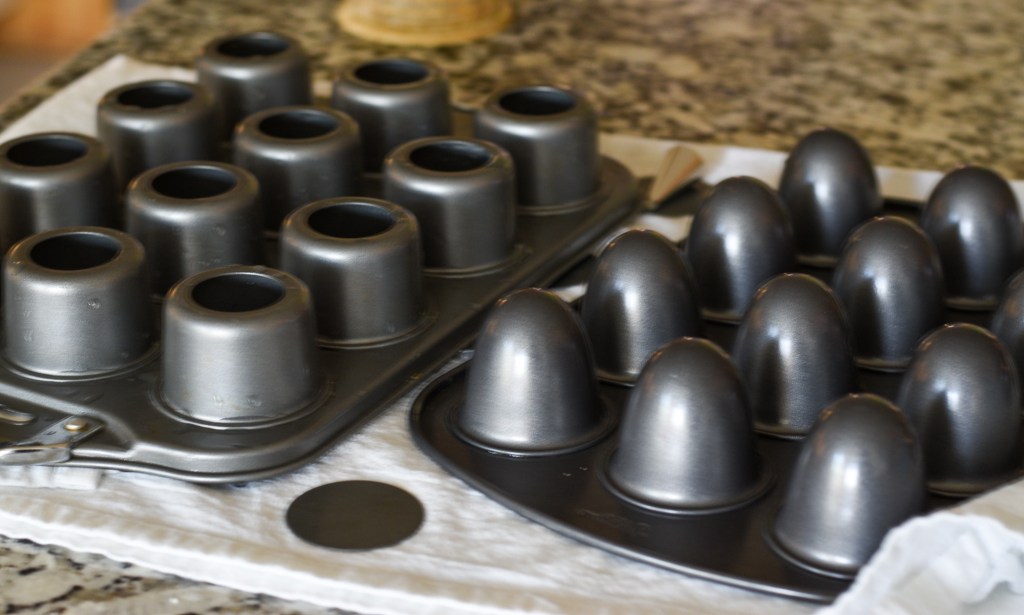
On to the recipe, which came from Taste of Home. In order to make it in mini-form, I actually tried two forms (shown below) – the one on the left is the Norpro Mini Cheesecake tin with the removable bottoms – this tin worked the best for this recipe. I also tried it in the Wilton 12-cavity cake pop pan on the right, though the recipe is written for the one-and-a-half inch rounds of the Norpro cheesecake tin. (More about the results with the cake pop pan below the recipe.)
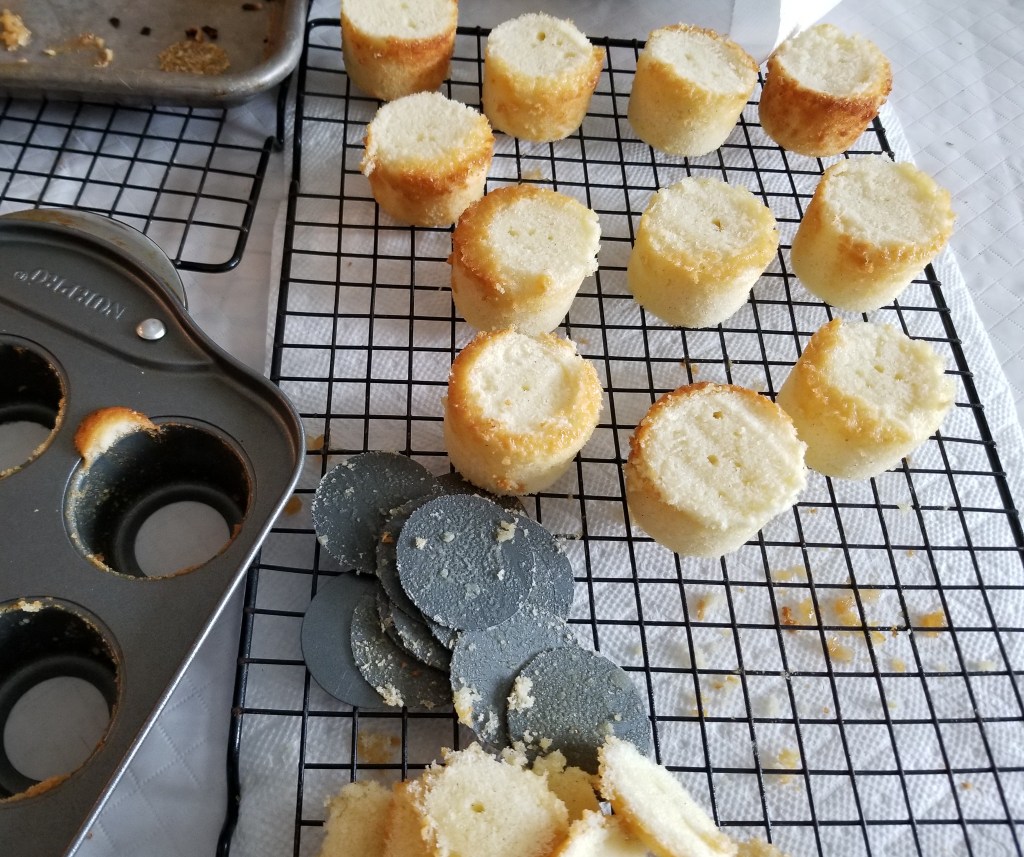
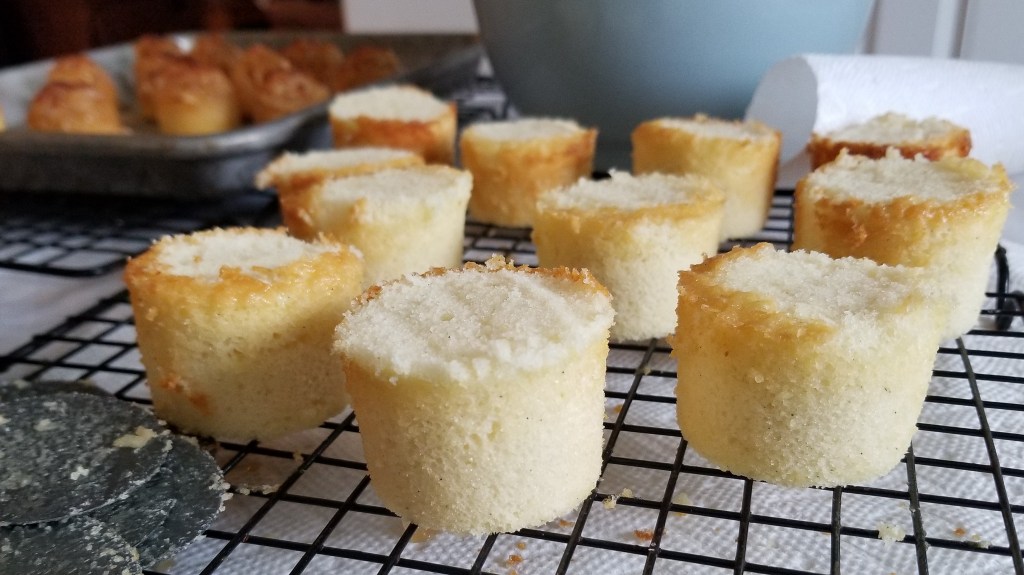
One tip, I went ahead and leveled off the tops of my mini-cakes before adding the frosting. In this case, because the frosting goes under the broiler and drips over the side a bit, I think it’s good to start with a somewhat level cake so a good amount stays on top of the cakelet.
I think it must be the use of the cake flour that gives the cake such a fine crumb – it’s a lovely dense cake without being dry or heavy. It’s a pourable batter, more like a pancake than a typical cake. Though I’ll probably try this cake recipe with other flavors and frosting, it is really delicious.
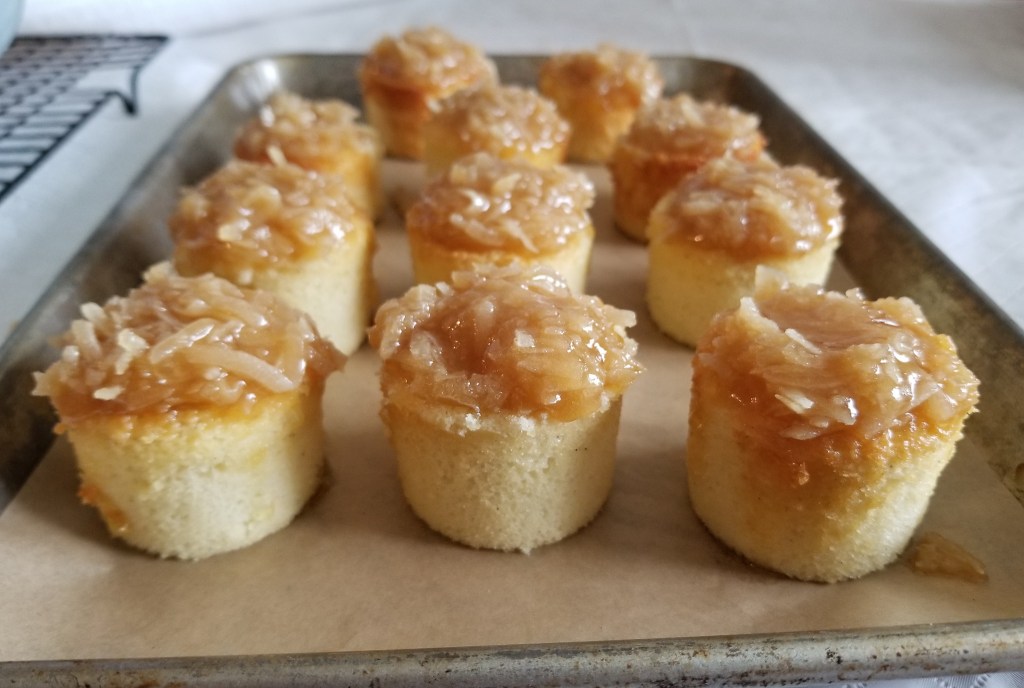
I applied the frosting fairly liberally, going back once every cakelet had some frosting on it to add more and use up all the frosting.

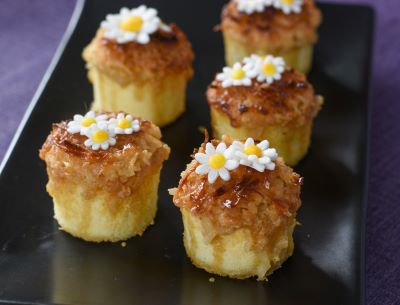
So you can see the Before and After (the broiler)…I could probably have pulled my cakes out from the boiler just a tiny bit sooner, though I don’t mind a darker caramelization, as a rule.

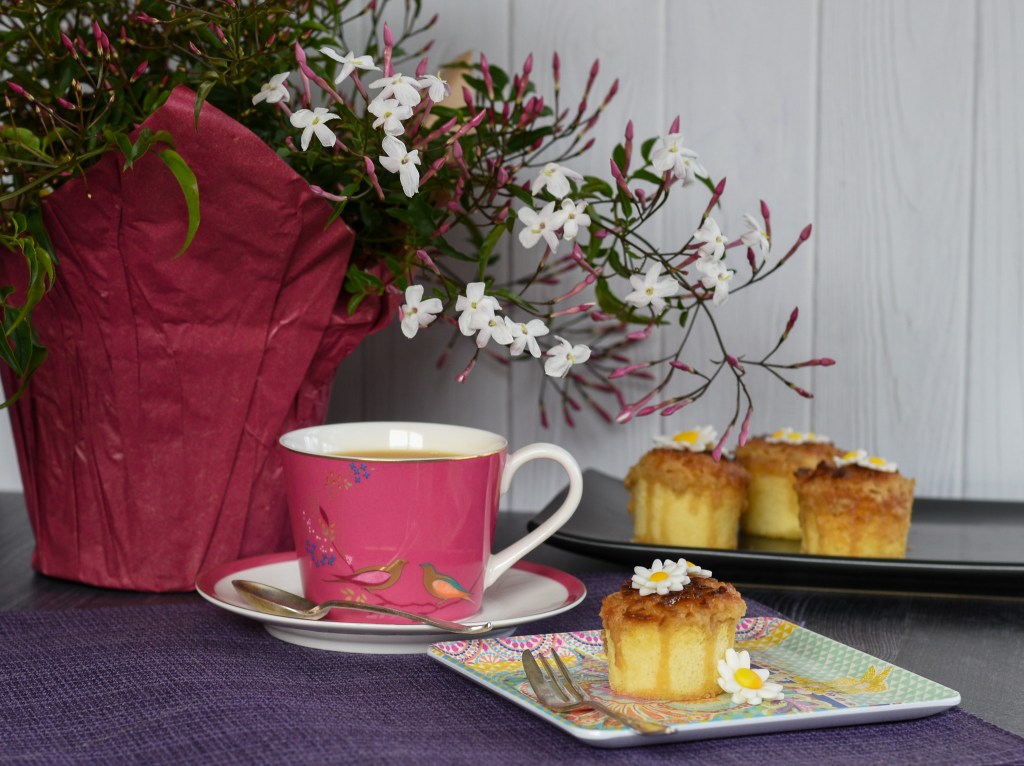
The original recipe doesn’t call for any decoration, really, but who could resist adding a few fondant daisies to fancy them up a bit for afternoon tea? Not me, anyway! I love any chance to get the fondant and cutters out, and adding some daisies to makes these cakes much appropriate for a spring tea. I’ll use a plate rim to help get some shape to my flowers, depending on the flower, though I’m not too fussed, usually. Fondant will dry out, but it also stays pliable with humidity (which we have plenty of in Texas!).


I love how the frosting kind of drips over the side of these mini-cakes, just adds a bit more interest. Cutting them open, you can see I put a nice layer of the frosting on the top, a good ratio to the cake, I find. If you find a nice-tasting fondant, you can even eat the decoration, if you’d like!


My teacup is Sara Miller London Chelsea pattern in pink. I loved this jasmine plant that I just picked up from Trader Joe’s to accent my tea table.
Lazy Daisy Mini-Cakes
Ingredients
- 2 large eggs, room temperature
- 1 c. sugar
- 1 tsp. vanilla extract or vanilla bean paste
- 1 c. cake flour
- 1 tsp. baking powder
- 1/4 tsp. salt
- 1/2 c. 2% or whole milk
- 2 Tbsp. butter
- 3/4 c. packed light brown sugar
- 1/2 c. butter, melted
- 2 Tbsp. half-and-half cream
- 1 c. sweetened shredded coconut
- For decorating, if desired: white fondant, yellow food coloring, small daisy press molds to cut out daisies
Directions
To make the cake batter: Preheat the oven to 350° F. In a large bowl, beat the eggs, sugar and vanilla on high until thick and lemon-colored (about 4 minutes).Separately in a medium bowl, sift together flour, baking powder and salt. Add to the egg mixture and beat on low until just combined.
Heat the milk and butter in a small saucepan until the butter melts. Add to the batter, beating thoroughly (the batter will be thin).
Grease the baking tin – whether mini-cheesecake or square baking pan. Pour the batter into the wells of the tin, filling until about 3/4 full (for the mini-cheesecake tin), and completely filling the 9-inch square baking pan.
Bake until a toothpick inserted in the center comes out clean, 20-25 minutes (check after 20). Cool slightly.
To make the frosting: Blend all ingredients well – brown sugar, 1/2 c. melted butter, half-and-half cream and the coconut.
For the 1.5-inch round mini-cakes, you may want to level them off if they overran the wells of the tin by slicing off the uneven bits with a knife. Then spoon the frosting over the tops of the mini-cakes and set them on half-sized jelly roll pan with parchment. Place them under the broiler in the oven about 4 inches from the heat. Broil about 3-4 minutes or until the top is lightly browned. If making a 9-inch square cake, simply spread the frosting over the top and broil as instructed.
Serve the same day. If making the cake a day ahead, hold off on broiling the frosting until the day you are going to serve them.
So, while this version is not in the recipe itself, I did try making this in this cake pop tin by Wilton. Didn’t think this was entirely successful, as I had to put the frosting at the bottom of the little wells, and then pour the batter over it. This resulted in the cakes not rising up as well, and they were a little denser still. Still tasted fine when I broiled the icing over them, but they were hardly one bite at that point, they were so small. So I’d stick with the mini-cheesecake tin, or the usual 9-inch square cake tin.


These look so good! The flowers on top are so pretty too
LikeLike
Thanks so much!
LikeLiked by 1 person