About the same day I saw this recipe from Sue at The View from Great Island, I was shopping at the Joann’s down the road, where I can never resist checking out the baking aisles. Every time I go I see something new, or get good new ideas for afternoon tea treats.
This time, I happened to see this cake tin by Wilton that looks like mini bundt cakes (the official name is the Wilton Daily Delights Mini Fluted Tube Pan). Being a mini-cake freak, I couldn’t resist picking it up.


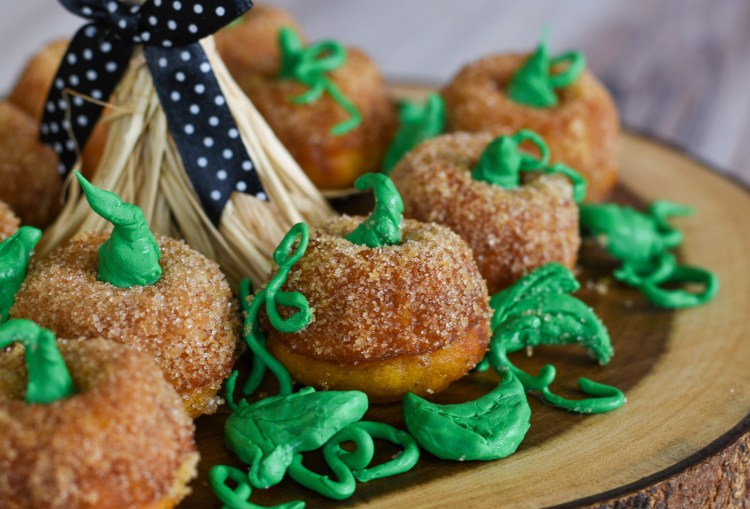
This was quickly followed by the thought that Sue’s recipe for Pumpkin Doughnut Muffins could easily be adapted to this pan, and turned into mini pumpkins in honor of the time of year. Add a little modeling chocolate, and the pumpkins could be turned into a pumpkin patch.
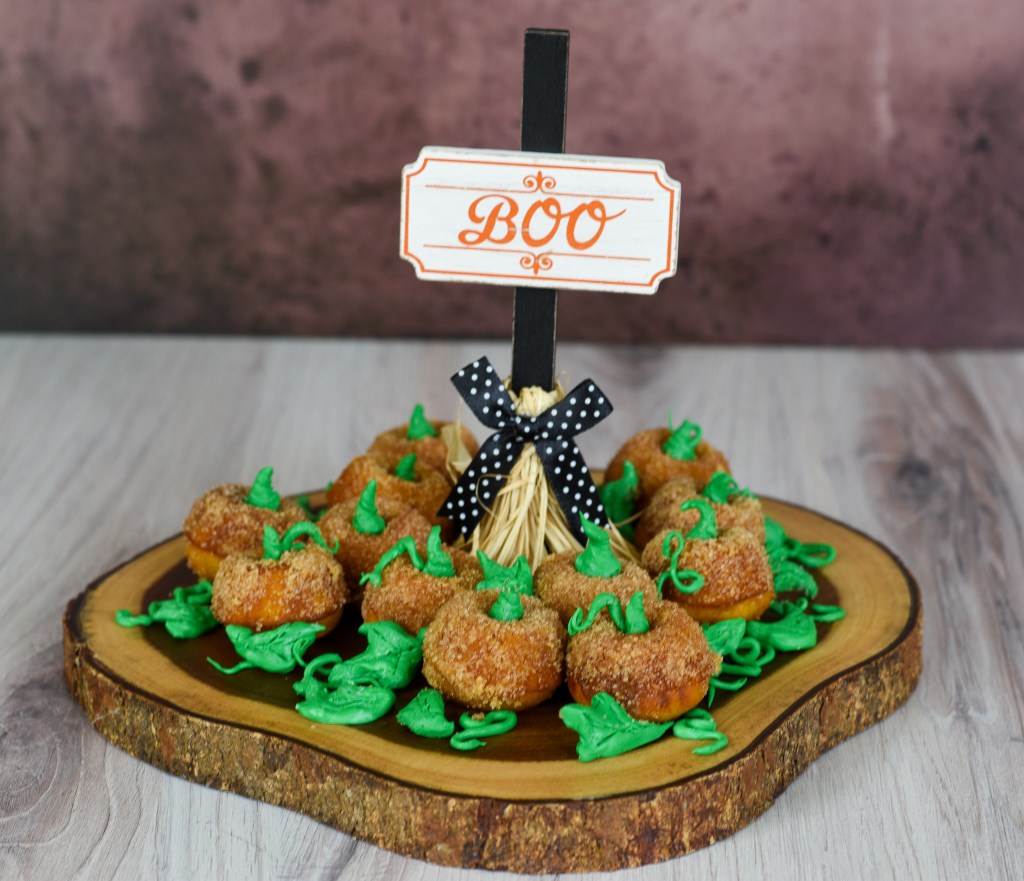
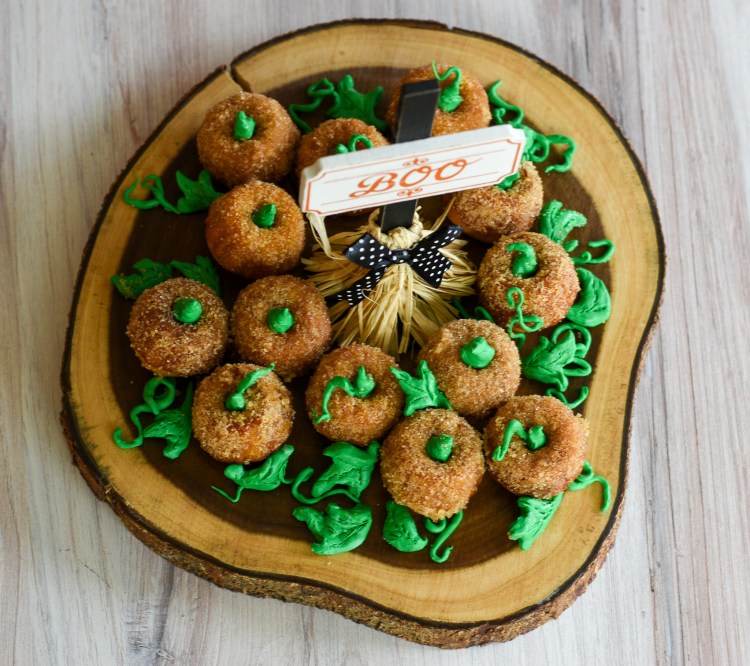
I don’t know about you, but I think this makes a great centerpiece to a Fall afternoon tea with good friends, good tea, good conversation. And a few more good pastries, of course!
The recipe is sublime – between the moist, crumbly cake, flavors of pumpkin and spices, and the best part of all – the sugar/cinnamon topping that crunches then melts in your mouth. I have to say I found them more than a little addictive!
Another great thing about this recipe – it’s simple, it takes just one bowl, and involves no electric implements. I always love it when whisk, spatula and spoon alone do the trick.
The first step is simply to whisk together the wet ingredients – sugar, oil, pumpkin, eggs, buttermilk and vanilla.

The spices come next – just add, and whisk, followed by the baking powder and salt – add and whisk.


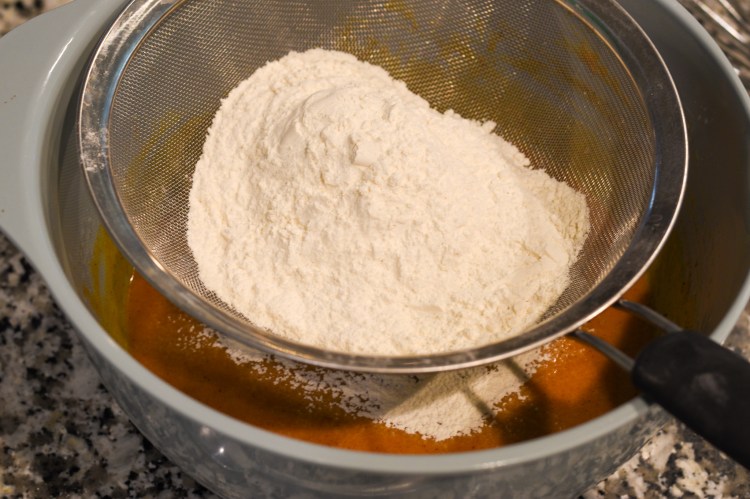
Sift and fold in the flour, and you’re ready to fill your tin. That’s it, that’s how easy it is!

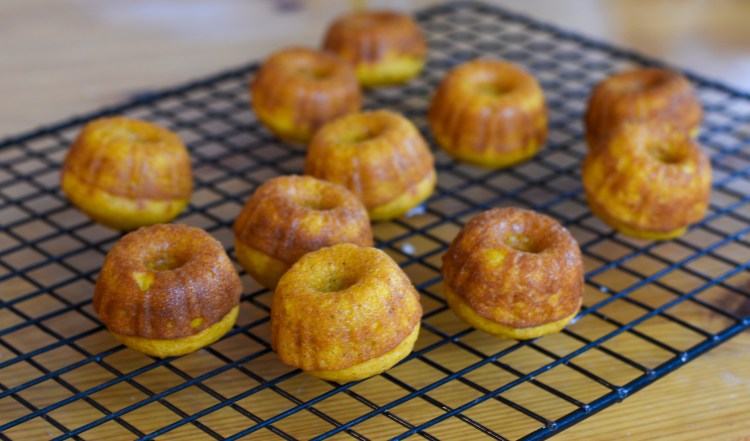
For these mini-bundts, a good-sized tablespoon sufficed to fill the holes, or about 3/4 full. They were a little rounded on the bottom, but that wasn’t a problem.


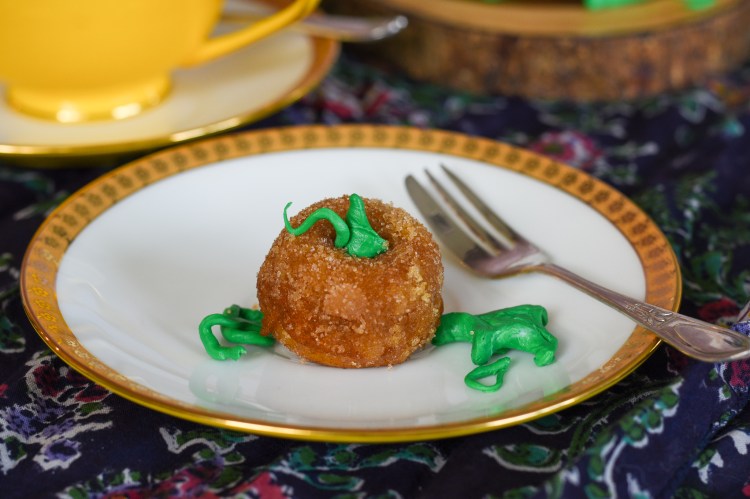
Brush on melted butter while they’re still warm, and immediately roll into the cinnamon-sugar mixture. Be liberal with the cinnamon-sugar – I rolled them really well a couple of times – trust me, it’s worth it!


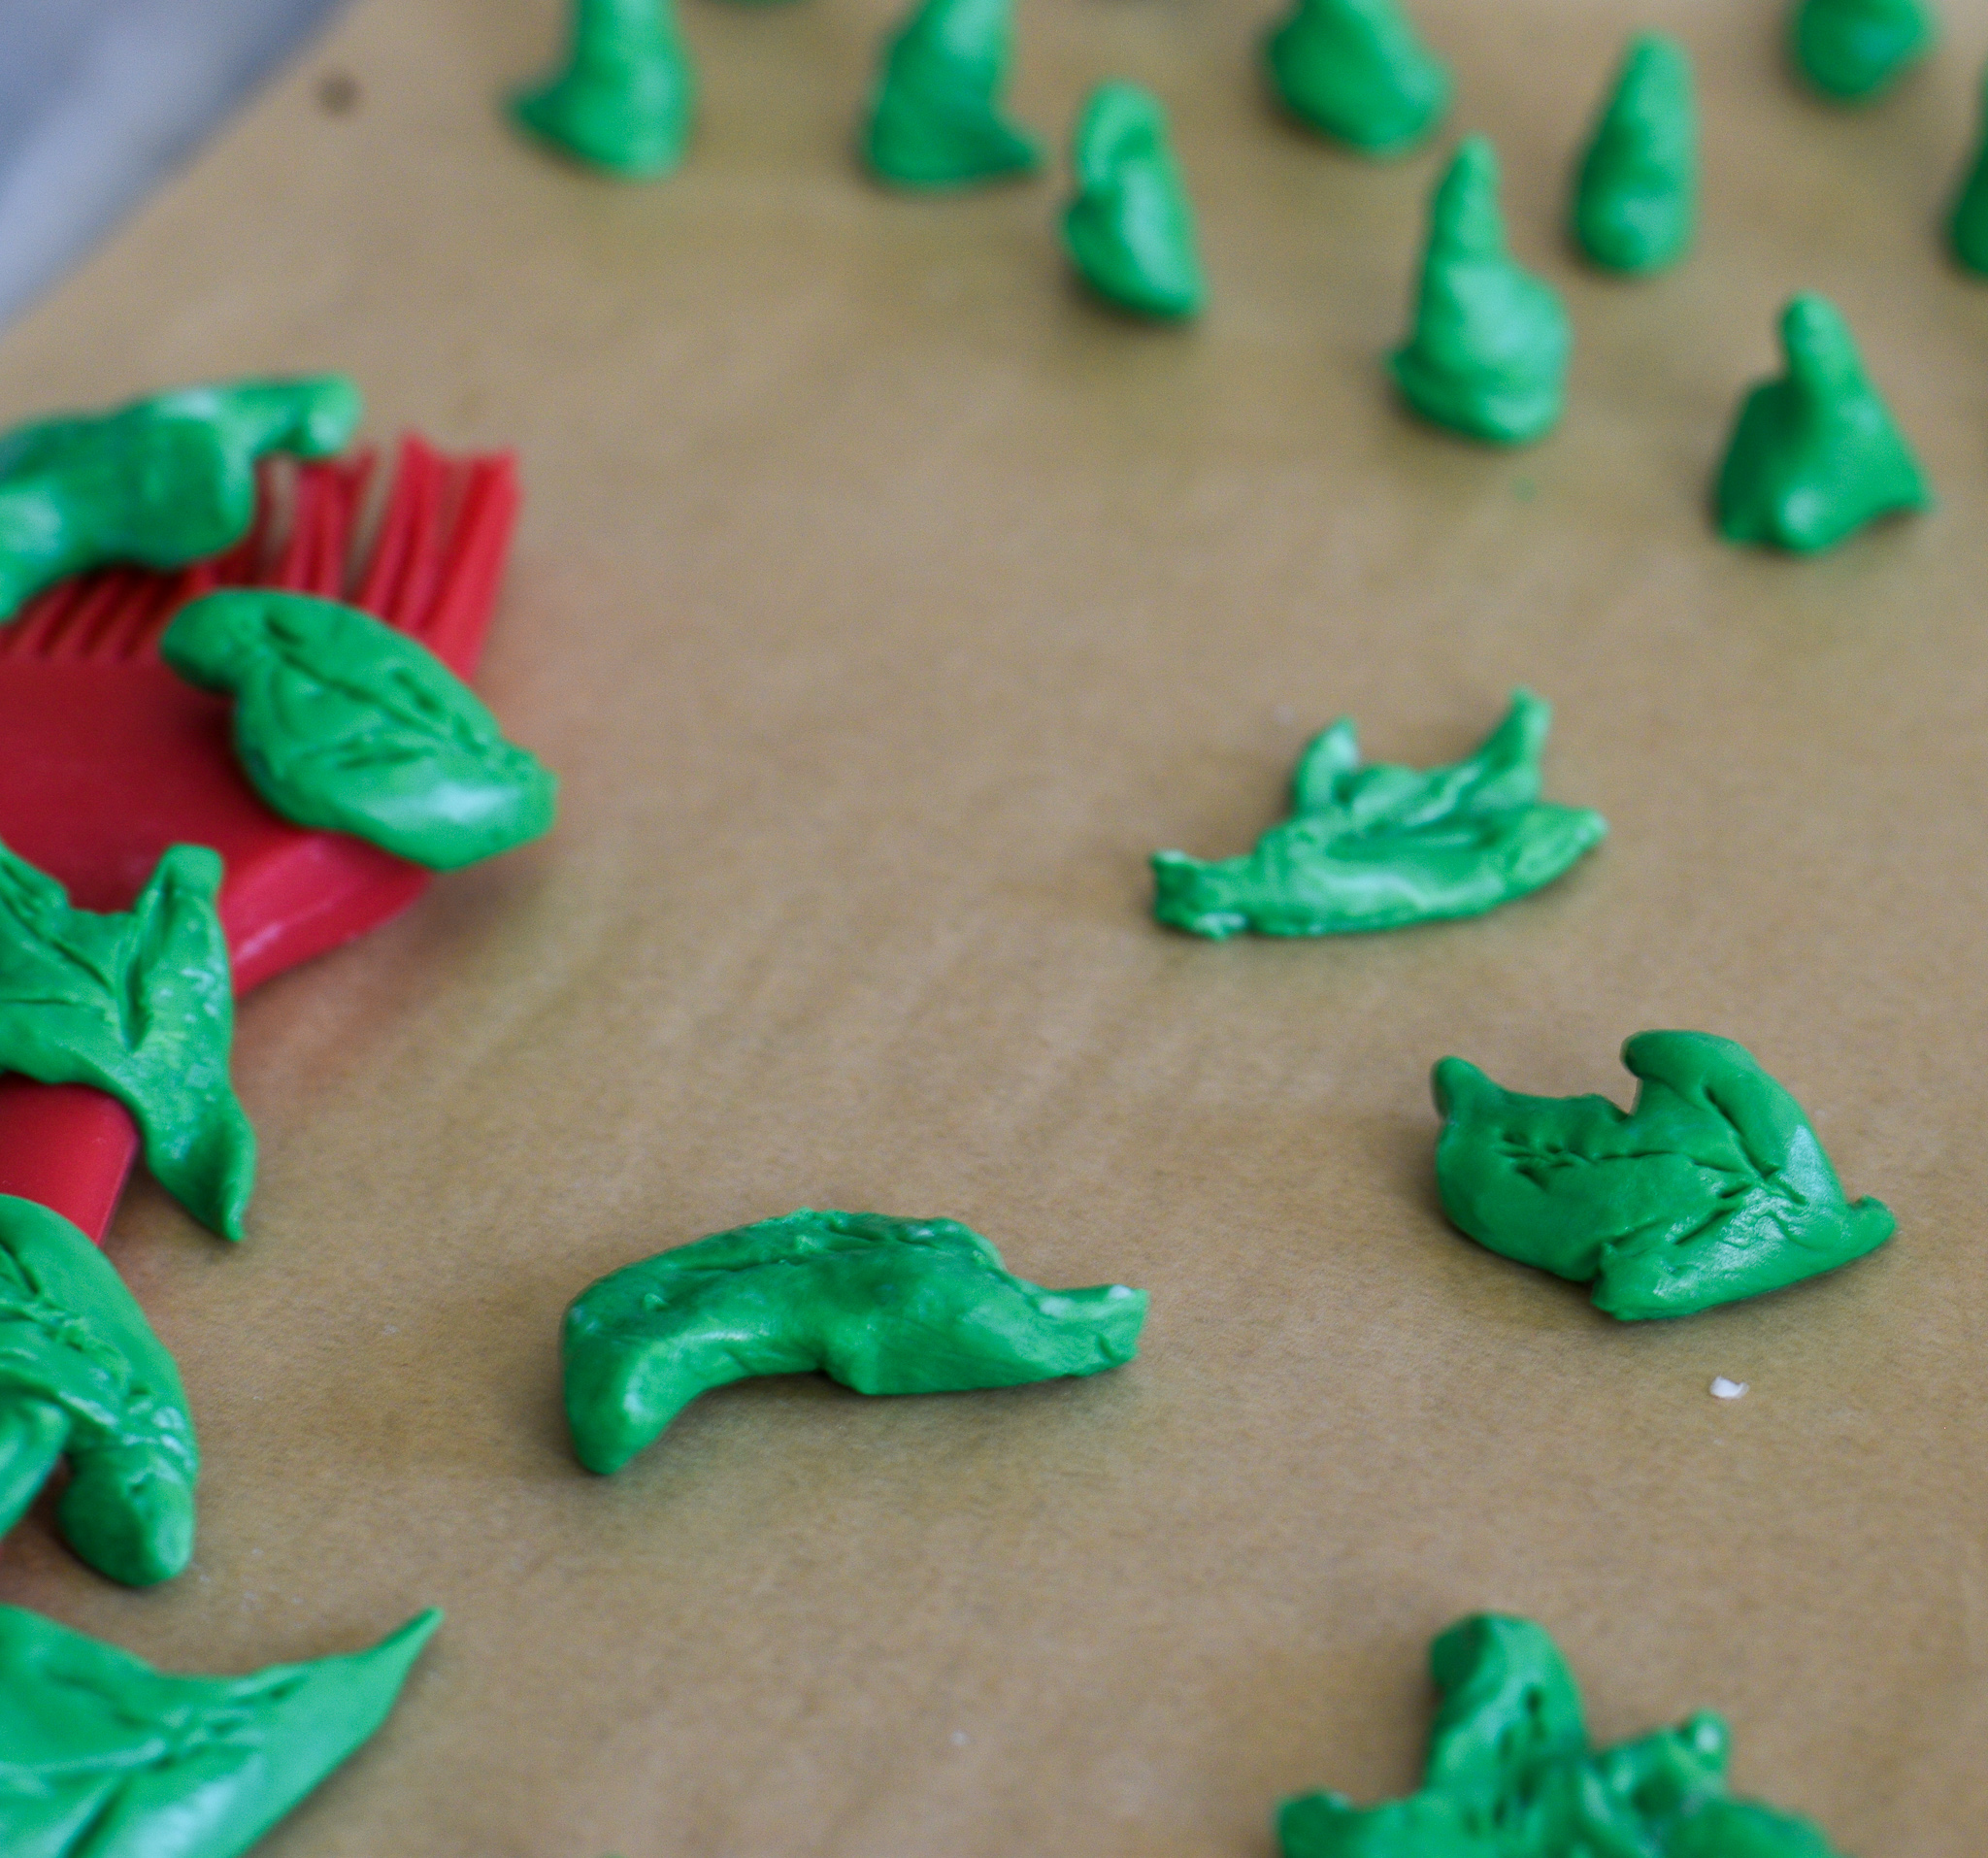
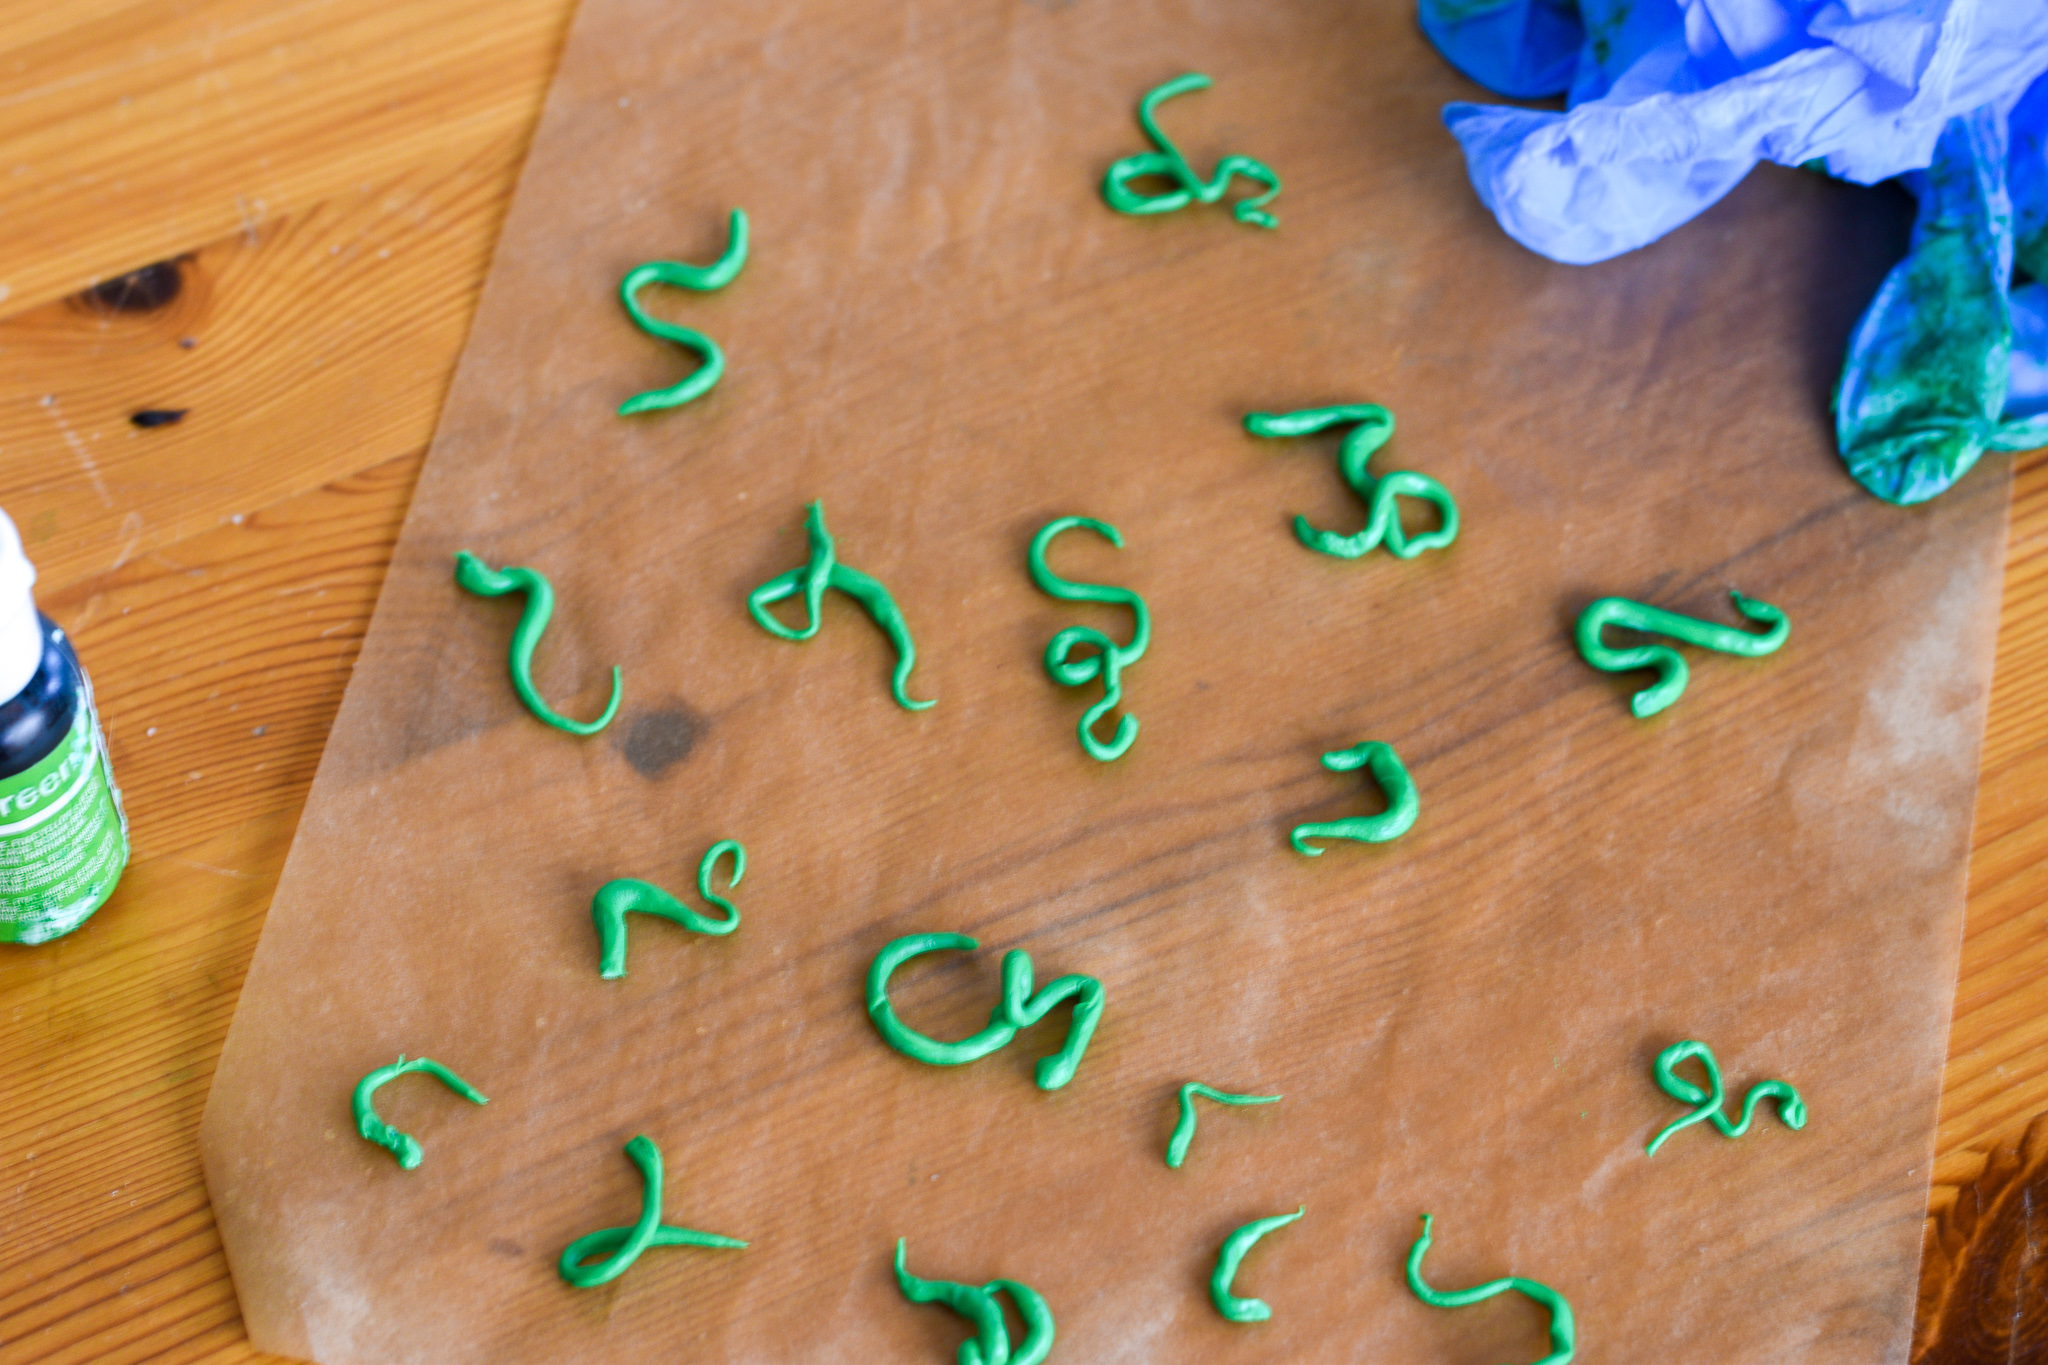
To turn these into pumpkins, I took some modeling chocolate (also from Joann’s), added some green dye, and made little stems, curly bits (that’s the technical term, by the way, or at least it should be!), and leaves. I was totally playing it by ear with these – searched for cartoon images of pumpkin patches, and tried to shape the green bits after them. Used thin surgical gloves to keep from getting my fingers all green.
Never worked with modeling chocolate before, so this was a bit of a stab in the dark. I let them sit on parchment, and put them in the fridge for awhile so they would be hard enough to keep their shape while I assembled my pumpkin patch.
Still, I was pretty pleased with how it turned out. See if you think this would work for your tea table!


Pumpkin Doughnut Mini Bundts

Ingredients
- 1/2 c. vegetable oil
- 1 c. granulated sugar
- 2 large eggs
- 1 c. pumpkin puree
- 3/4 c. buttermilk
- 1 tsp. vanilla
- 3/4 tsp. cinnamon
- 1/2 tsp. nutmeg
- 1/2 tsp. ginger
- 1/4 tsp. cloves
- 1 Tbsp. baking powder
- 3/4 tsp. salt
- 1 3/4 c. all-purpose flour
- 4 Tbsp. butter, melted
- 1 c. sugar + 1 tsp. cinnamon mixed together
- Couple ounces of modeling chocolate + green food coloring
Directions
Preheat the oven at 400 degrees Fahrenheit. Whisk together the oil, first cup of sugar, eggs, pumpkin puree, buttermilk and vanilla.Add the spices and whisk them in, then add the baking powder and salt, and whisk them in as well.
Sift the flour and fold it in until just combined.
Prepare your Wilton Daily Delights Mini Fluted Tube baking pan with cooking spray or butter; fill the tin holes 3/4 full. Bake 15-17 minutes, or until golden brown and a toothpick comes out clean. (If you are making regular muffins, this recipe will make 12 muffins, and bake for 20 minutes.)
Let them cool 10 minutes before removing from the tin. Then use a pastry brush to brush on the melted butter, and dip into the sugar-cinnamon mixture (dip really well, a couple of times for a nice crunchy topping).
To make the modeling chocolate pumpkin pieces, take a couple of ounces of white modeling chocolate and work in a couple of drops of food coloring (more if you want a darker color). Use thin surgical gloves if you want to keep the dye from getting on your hands.
Start shaping the pieces to add to your mini bundt cakes – the stems, tendrils, and leaves. Set them on parchment paper and set aside to harden (I put them in the fridge for 30 minutes).
Once the chocolate has set, you can assemble your pumpkin patch. Pull out whatever serving dish or wooden serving board you want to use so you can set them on the dish as you put them together. Because the cake tin has a little depression for where the stem goes, you don’t need to use any kind of icing to glue them in, you can just insert the stems into the depression.
Set them on the serving dish and place the tendrils and leaves on and around the cakes to create the effect you wish. I did not use any icing, but if you wanted tendrils or leaves to stay more firmly in certain spots, you could use a little green icing. Add any other decorative items you wish for the desired look to finish your centerpiece.
And there you have it – a pretty and tasty centerpiece to adorn your next Fall tea table. Enjoy!